Introduction: Applying a varnish protective coat to a canvas print is an excellent way to enhance its longevity and preserve its beauty. While the process may seem daunting, it can be easily accomplished with the right materials and techniques. In this article, we will provide a step-by-step guide on how to apply varnish to a canvas print effectively.
Step 1: Gather the Necessary Materials: Before you begin varnishing your canvas print, ensure you have the following materials on hand:
- Varnish: Choose a varnish specifically designed for artwork, such as a clear acrylic varnish.
- Soft-bristle brush or foam brush: Select a brush that is appropriate for the size of your canvas and has soft bristles to avoid leaving brush marks.
- Dust-free environment: Find a clean and dust-free area to work in, preferably indoors, away from direct sunlight and strong drafts.
- Clean cloth or microfiber duster: Use this to remove any dust or debris from the surface of the print before varnishing.
Step 2: Prepare the Canvas Print: Start by gently dusting off the surface of the canvas print using a clean cloth or microfiber duster. Ensure there are no loose particles or debris that could become trapped in the varnish. It’s important to work on a clean surface to achieve a smooth and flawless finish.
Step 3: Test the Varnish: Before applying varnish to the entire canvas, perform a small test on a discreet area to ensure compatibility and desired results. Apply a thin layer of varnish and allow it to dry completely. Assess the finish and appearance before proceeding.
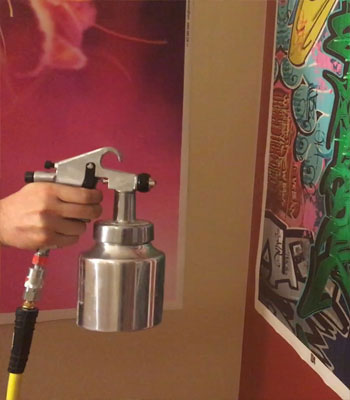
Step 4: Apply the Varnish: Once you are satisfied with the test patch, it’s time to apply the varnish to the entire canvas print. Pour a small amount of varnish into a clean container or palette. Begin applying the varnish evenly, working from one edge to the other in long, smooth strokes. Avoid excessive brushing or overworking the varnish, as it may create streaks or bubbles.
Step 5: Allow the Varnish to Dry: After applying the varnish, allow the canvas print to dry in a dust-free environment. Follow the manufacturer’s instructions for the recommended drying time. It is crucial to avoid touching or disturbing the varnished surface during this period to prevent any imperfections.
Step 6: Apply Additional Coats (Optional): Depending on your desired level of protection, you may choose to apply additional coats of varnish. If applying multiple coats, ensure each layer is fully dry before applying the next. Remember to follow the manufacturer’s instructions regarding drying times and the number of recommended coats.
Step 7: Final Inspection: Once the varnish has fully dried, inspect the canvas print for any imperfections or areas that may require touch-ups. If needed, lightly sand the affected area with fine-grit sandpaper and reapply a thin layer of varnish.
Conclusion: Applying varnish to a canvas print is a straightforward process that significantly enhances its durability and aesthetic appeal. By following these step-by-step instructions, you can protect your canvas print from environmental factors, preserve its colors, and enjoy its beauty for years to come. Take your time, work in a clean environment, and enjoy the rewarding process of varnishing your canvas print.