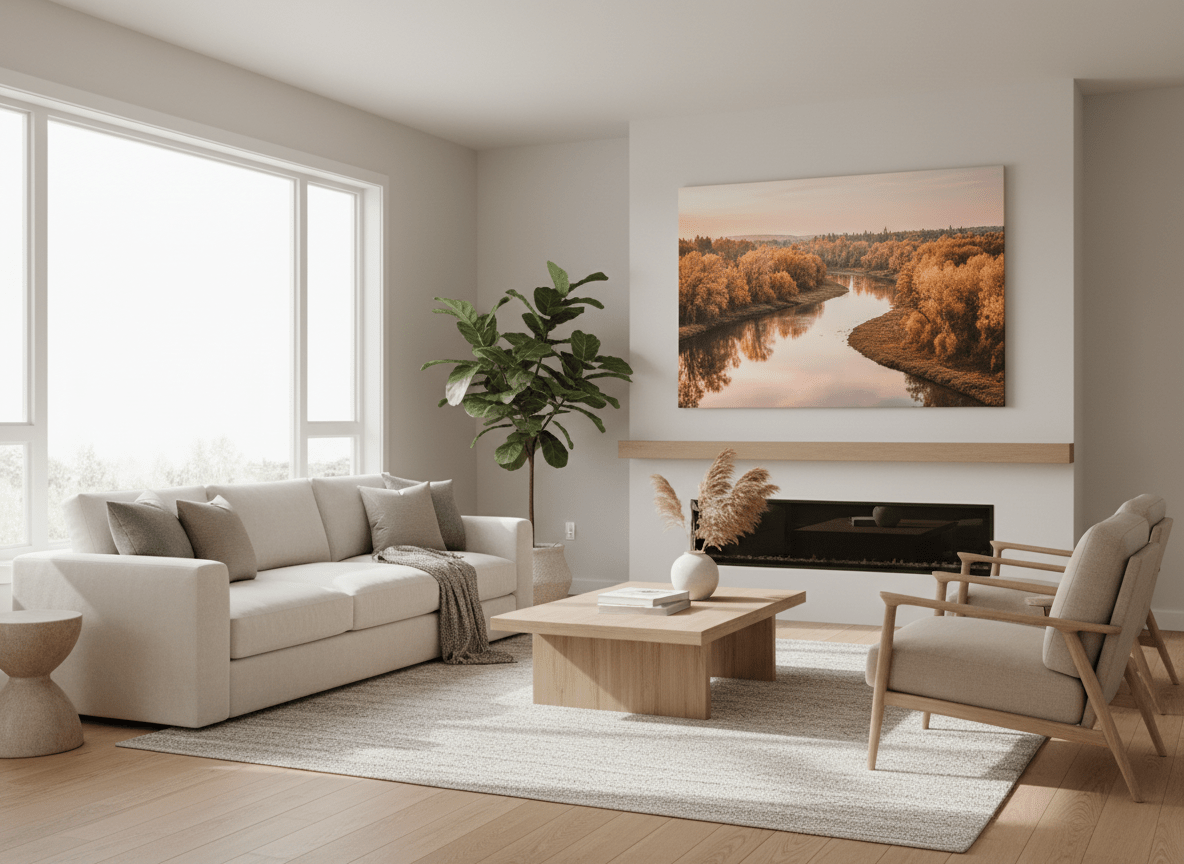
Edmonton has a secret superpower: nature is basically built into the city. You can be downtown, grab a coffee, and ten minutes later you’re walking under big trees in the River Valley like you’ve escaped your responsibilities.
If you’ve got photos from those walks—spring greens, summer sunsets, fall gold, winter frost—don’t let them live and die in your camera roll. Turn them into museum-grade canvas prints and build a nature wall that makes your home feel grounded, warm, and very “yes, I have my life together.”
This post is a practical guide to creating an Edmonton-inspired canvas wall using your own photos (or art). You’ll get:
- the best River Valley photo types for canvas
- size and layout ideas that look intentional
- color tips for Edmonton’s changing seasons
- simple file prep so your prints look sharp
Why River Valley photos look so good on canvas
Canvas is made for texture, depth, and natural light. That’s why landscapes and nature shots—especially Edmonton’s—print beautifully.
River Valley photos tend to have:
- layered greens and blues
- soft sky gradients
- interesting tree texture
- warm golden-hour light
On canvas, those details feel less “phone photo” and more like art.
Step 1: Choose a theme for your Edmonton nature wall
You don’t need to be a designer. You just need a simple theme so the wall feels cohesive.
Pick one:
Theme A: “Four Seasons, One City”
Choose 4 photos from the same spot (or similar vibe) across seasons:
- spring: fresh green leaves
- summer: long evening light
- fall: gold and rust tones
- winter: frost, snow, blue shadows
This looks amazing as a grid.
Theme B: “Golden Hour Edmonton”
Edmonton sunsets are not subtle. If you have:
- sun through trees
- warm sky over the river
- silhouettes on a bridge
That’s your wall.
Theme C: “Moody Winter Calm”
Winter photos can be stunning on canvas when you lean into the mood:
- snowy trails
- foggy river scenes
- soft grey skies
This style looks especially good in modern interiors.
Step 2: The best Edmonton photo types to print on canvas
Here are the photo styles that consistently look great as custom canvas prints:
1) Trail perspective shots
A path pulling your eye into the distance = instant art.
2) Tree canopy shots
Look up. Those branches and leaves create natural patterns that canvas texture loves.
3) River reflections
Water + sky reflections add depth and calm.
4) Simple “one subject” photos
A single bench, a bridge, a person walking—minimal photos can look expensive on canvas.
5) Family-in-nature photos (the candid kind)
Not the stiff “everyone smile.” The real ones:
- kid mid-laugh
- dog doing something chaotic
- you walking and not looking at the camera
Those are the photos you’ll actually want on your wall.
Step 3: Pick canvas sizes that fit real Edmonton spaces
Most people either go too small (and it looks like a postage stamp) or too big (and it dominates the room). Here’s a simple sizing guide that works.
Above a sofa
- One statement canvas: 24×36 or 30×40
- Or a set: 3 canvases at 16×20
Above a bed
- One wide piece: 24×36
- Or two pieces: 16×20 + 16×20
Hallways and stair landings
- 12×16 or 16×20
- 3–5 pieces in a line or staircase layout
Home office
- One calm landscape: 16×20
- Or two smaller: 12×16
If you’re unsure, choose one “hero” canvas (16×20 or 20×30) and build around it later.
Step 4: Layouts that always look polished
Layout 1: The clean grid (modern, calm)
- 4 canvases the same size
- even spacing
- works perfectly for “Four Seasons” sets
Layout 2: The hero + supporting pieces (easy, flexible)
- 1 large canvas
- 2–4 smaller canvases around it
Layout 3: The hallway story line
- 3 canvases in a row
- keep the spacing consistent
Spacing tip: aim for about 2–3 inches between canvases. Consistent spacing is what makes it look intentional.
Step 5: Match your canvas wall to your room (without overthinking)
Here’s the trick: pull one color from your photos and repeat it in the room.
Examples:
- deep green from trees → a throw pillow or plant
- warm sunset tones → a tan blanket or wood frame accents
- winter blues → a grey rug or navy cushion
Your wall will instantly feel “designed,” even if you did it in 12 minutes.
Step 6: Make sure your photo is print-ready
A museum-grade canvas deserves a decent file.
Do this before uploading:
- use the original photo file (not a screenshot)
- avoid images sent through apps that compress heavily
- if it’s from a newer phone, you’re usually fine
If you’re not sure, upload it anyway. We can help you confirm whether it will print sharp at your chosen size.
Why museum-grade canvas matters for nature prints
Nature photos are all about subtle detail: gradients, texture, shadow.
That’s why we use:
- premium cotton canvas
- pigment-based archival inks for long-lasting color
- handcrafted Canadian fir stretcher bars made in-house
You get a canvas that looks rich and crisp now—and still looks good years down the road.
Edmonton idea: create a “calm corner” wall
Pick one spot in your home that you want to feel quieter:
- a reading chair
- a hallway you walk through daily
- your home office
Then print one River Valley canvas that sets the mood. Add two smaller pieces later.
It’s a small change that makes your space feel more like a home and less like a storage unit with Wi‑Fi.
Helpful canvas print resources
Planning your order? Compare canvas print pricing, upload your image and order online, review our canvas print quality, or check returns, refunds, and shipping details.